Thursday, October 10, 2013

Time to Dust Off the Cobwebs

How is everybody?  I know.  It's been a long time...like a year.  And it has been a crazy one.  I'll catch you all up later.  I promise!  But, I had to let you know of an awesome deal that My Memories is offering all of my awesome blog followers right now.  Until October 16, you can download their awesome software, absolutely free!  (Did that sound like an infomercial to anyone else?)  But seriously, this really is such an amazing deal!

I love My Memories.  I use it for scrapbook pages like these:


For School Posters like this one:

For invitations like these:


I've also used it to create gifts, blog pictures, and party decorations.

It is super simple to use and it comes already loaded with lots of fun papers, embellishments, and photo editing tools.  It automatically loads all of your fun fonts that you have downloaded to your computer. And don't get me started on all the many free and affordable embellishments, papers, and kits on their website.

I seriously could go on and on about this program, but then you wouldn't be finding out for yourself.  So, Here's the code:
FreeTreatAL15

Copy it from here, go to mymemories.com, add the software to your cart, and copy the code into the promotion spot at checkout.  Be sure to check out all the other fun stuff they offer while you are there!


What are you waiting for???  Go, do!  And let me know once you've created something.  I'd love to see what you make!

P.S.  Remember that this deal ends on the 16th, which is next Wednesday, so hurry and get your copy!


Sunday, October 14, 2012

Holly Designs Winner

I know I am a little late, so I will get straight to business.

I used the Random.org to choose a winner, and that winner is...

Emilee R.!
Emilee, I sent you an email with the information you will need to get in touch with Holly about your prize.  Enjoy!

Thursday, October 11, 2012

Candy Land {decorations}

{Don't forget to get entered in the giveaway for a $20 credit to Holly Designs by going here!}

Candy Land {decorations}
Okay, this party is seriously messing with my sweet tooth!  I mean, it's hard not to want to pull out the candy stash when you look at these pictures.
I showed you the giant lollipops yesterday.
I cut the gumdrops out of cardboard we had laying around.
I let the kids help me paint them.
It's hard to see in the pictures, but we sprayed them with some glitter to make them look sugary.
Giant Game Pieces
I used some sheet rock scraps we had left over from our basement remodel to make the game pieces.
I just free-handed half of the game piece, then traced that half on the other side so they would be symmetrical.
Then Nate cut them out with one of his {many} saws.  I'll be honest.  I have no idea what it is called!  Ha!
We propped the game pieces up against stakes throughout the yard.
{And by WE, I mean Nate ;) }
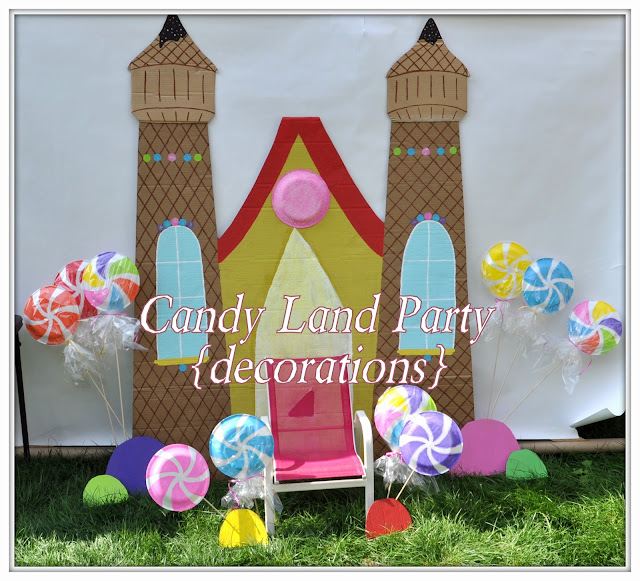
Candy Land {castle photo backdrop}
My biggest undertaking was DEFINITELY King Candy's Castle.
My father-in-law let me at his giant cardboard stash.
I free-handed the castle in pencil.
Then I painted it with craft pain and added glitter to the "candy" pieces.
Now that the party is over, I'm not sure what to do with it?
I'm pretty proud of it and don't want to just throw it away.
Any idea?

P.S.  Only 2 more days to get entered in the giveaway!
Don't miss your chance to get your little one a darling applique of your choosing!
So far, entry is low, so your chances are good at winning!

P.P.S.  Tomorrow is more Candy Land Fun.  See you then!

Wednesday, October 10, 2012

Candy Land Birthday Party {giant lollipops}

 Don't forget to enter the giveaway here!!
Candy Land Party {giant lollipops}
Did you get entered into the giveaway?  Good!
Now let move on to the rest of the Candy Land Party, shall we?
Today, I want to share with you my very favorite decorations.
GIANT LOLLIPOPS!
Candy Land Party {giant lollipops}
These are so simple to make.  I ended up making about 20 suckers.
1.  Collect your supplies
*Styrofoam plates
*Foam Brush
*Small paint brush
*Stencil (I used a flower cutout that comes with the Silhouette, making sure to cut it larger than my plate)
*Scoring tool
*Paint
*Wooden Dowels
*Cellophane
* Ribbon
2.  Use your scoring tool to mark you candy swirl shape on your plate
3.  Use the small paint brush to paint along your scored lines
Now is a good time to take a little beverage break ;)
4.  Fill in with the foam brush
5.  Hot glue dowel to the back of the plate
I covered some of the "suckers" with cellophane and tied it with some curling ribbon

Now step back and admire your simple simply ADORABLE party decorations!
Go get some Styrofoam plates, enter the giveaway, and meet me back here tomorrow for some more Candy Land fun!

Monday, October 8, 2012

Candy Land Birthday Party {Outfit...& a giveaway!}

Hey everybody!  I'm finally coming up for air after a whole lot of party planning, 2 parties, and the flu.  Whew!  It's been a while.
I want to start things off with something really fun that I get to share with you!

Back to the party
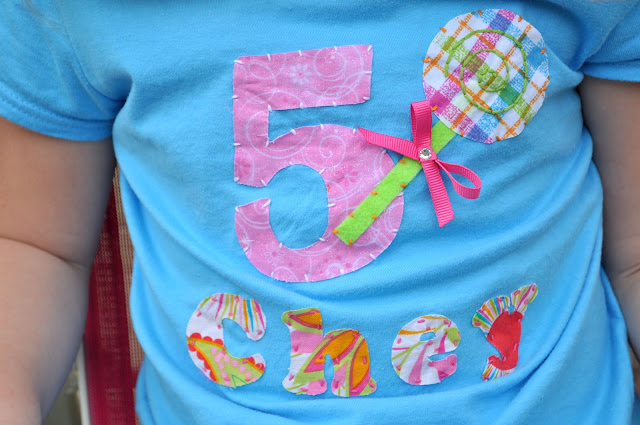
Candy Land {Shirt}
Chey turned 5. FIVE!!!  She just barely missed the cutoff for Kindergarten, and she was totally bummed.  But we kept her mind off of it by planning a very fun, pretty over-the-top CANDY LAND PARTY!

Just after I started planning the party, I was contacted by the sweetest lady ever.  She is the talent behind Holly Designs.  Holly creates the cutest little appliqued clothes for your kiddos.

I knew I wanted to make an outfit for Chey that would match the theme, but I had so many plans for the actually party, that I was ecstatic when Holly offered to make her a sweet little custom shirt.
 
That's right!  All of Holly's designs are custom, made to order.  What little kid doesn't love something that is personalized with their name?  And what Momma doesn't love an amazing offer like that?
Of course I just HAD to go with the adorable lollipop shirt.  I mean, it was a Candy Land party, after all.
From there, Holly had me pick the color and size of the shirt, plus the fabric for the applique.
Candy Land {Shirt}

Holly was so amazing to work with and had the shirt to me in record time.  She even included a cute little pinwheel bow for the birthday girl!
Candy Land {Shirt}
I have to tell you, these pictures were taken after a serious encounter with some spray & wash and a scrub brush.  Chey got REALLY into the party activities before I got a chance to take pictures of her in the shirt.  I was mortified!  But the applique held up beautifully!
Candy Land {Shirt}
Thanks, Holly for taking that stress off my shoulders!  And your work is fantastic!

Okay, so here's the part you have been waiting for.
Holly has very generously offered to give one of you a $20.00 credit to her shop!
 To enter this giveway, follow these easy steps:
1.  Mandatory entry:  Like Holly's Facebook page by going here
2.  Visit Holly's Etsy shop, Holly Designs and let me know what your favorite design is.
3.  Become a follower of Momma Did It (points to those of you that already were following along, too!)

Be sure to leave a comment for each entry!  I will pick a winner on October 13th, so don't forget to check back to see if you are the lucky winner!

Wednesday, August 22, 2012

Rainbow Party {activities}

 I'm back, as promised, with the activities from Charly's Rainbow Party.
As I said, we did 7 activities.  One for each color of the rainbow.
But I couldn't just leave it at that.
No.  I had to make a little poem for the kids to read to take us from activity to activity.
So, here we go!
Each station was labeled with the color and activity.
I used fabric, paper, whatever I had in my stash to bring as much of that color's activity into the area.

Red, Orange, Yellow, Green, Blue, Purple, and Pink.
We'll get the fun started in just a blink.
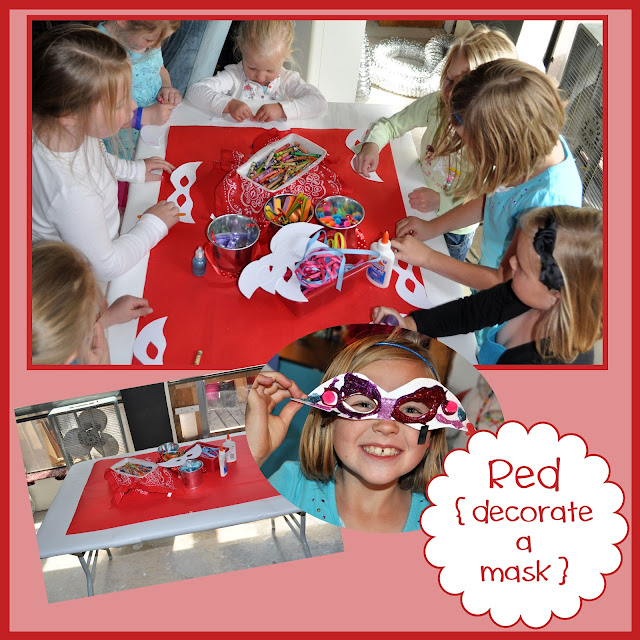
On the red table is a creative task.
Grab some glitter and glue and decorate a mask.

Rainbow Activities {decorate a mask}

Orange comes next in the rainbow, it's true
An orange box is up next for you, too.
Find the orange box and open it up.
Our next bit of fun is a little dress up.
Rainbow Activities {dress up}

Yellow is the color of the sun
And for you it means some ring-toss fun.
Out on the patio you will go
To practice your ring-toss throw.
Rainbow Activities {ring toss}

 Across the green grass we will go
to crawl, jump, hop, and even throw.
To start the race, find the giant green arrow.

To reach the finish line, follow the rainbow.

Rainbow Activities {obstacle course}
 {There were 7 parts to the obstacle course:
1.  tip toe through the red flowers
2.  weave through the orange cones
3.  leap through the yellow "sun" (hoola hoop)
4.  crab walk through the green grass
5.  run under the "blue sky" (tarp)
6.  toss the purple eggs into the basket
7.  hop over the pink finish line

We've worn ourselves out with our little race
So let's slow things down with a change of pace.
Grab a drink and a snack, then take a seat.
Charly will open presents and we'll have a little treat.


Rainbow Activities {presents & food}

 A rainbow of colors to adorn our nails
is what fills this little pail
So head on over to the purple flower
To paint your nails and get some girl power!
Rainbow Activities {manicures & goodie bags}

At the end of this rainbow is a great big explosion
Don't worry, it won't hurt you though it may cause some confusion.
So grab a bag and meet by the pink wall
For a down pour of candy, you'll bring home quite a haul!
Rainbow Activities {candy cannon}
If you have never experienced a candy cannon you are missing out!
It literally BLASTS candy across the yard.
They have become a tradition in our family on most holidays that the weather permits.
(I'm guessing brown slush covered smarties aren't the best ;)

I hope you enjoyed Charly's party and found a little inspiration for your child's magical day!
Thanks for stopping by!

Rainbow Party {decor & food}

Rainbow Party {decorations & food}
I have a confession to make.
Ready?
This party was clear back in APRIL!  I know.  Shameful.
I had totally lost my blogging mojo.
But it seems to be back now, so let's get on with this, shall we?
Rainbow Party {invitation}
Charly requested a rainbow party this year.
SWEET!  She already had a cute little outfit to fit the theme.
And there are so many ADORABLE rainbow party ideas out there!
Check out my Pinterest board that is dedicated to all things rainbow-party-goodness here.Rainbow Party {decorations}
Because it was the end of April and was SUPPOSED to be a nice Spring day, 
I went with an outdoors-y, spring is in the air Rainbow theme.
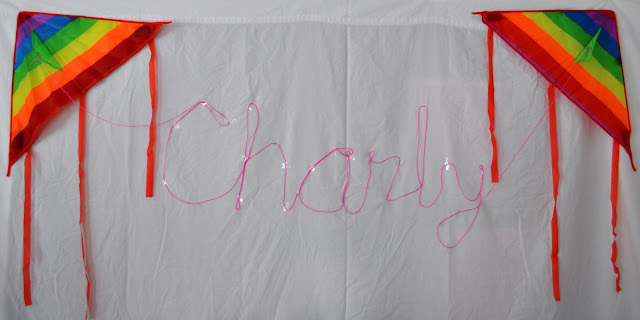
I got the rainbow kites in the $ Spot at Target and used pink string to write Charly's name between the two.

Rainbow Party {pinwheels}
My ABSOLUTE FAVORITE decorations were these pinwheels.
I just love how they turned out!
I used this pattern found here.
Rainbow Party {pinwheels}
No, I did not cut them all out by hand.  Are you crazy? ;)
I wrote the designer and asked for permission to convert the pattern into a Silhouette template.
They very graciously said yes.  Thank you!
I can't even tell you how much time that saved me!
(I recently found a pinwheel that looks similar to this in the Silhouette store,
if your interested.)
Rainbow Party {pinwheels}
I used this tutorial to color the bottles.
I used sand to weigh them down, but I don't think it is really necessary.
Over time, the sand has absorbed all the color off the bottles.

Rainbow Party {decorations}I hung balloons from the ceiling for a simple, fun photo backdrop.Rainbow Party {decorations}
The table skirt was a total last minute idea.
It needed more color, so I folded some tissue paper in half
and taped it like pennants around the table.
Easy Peasy!
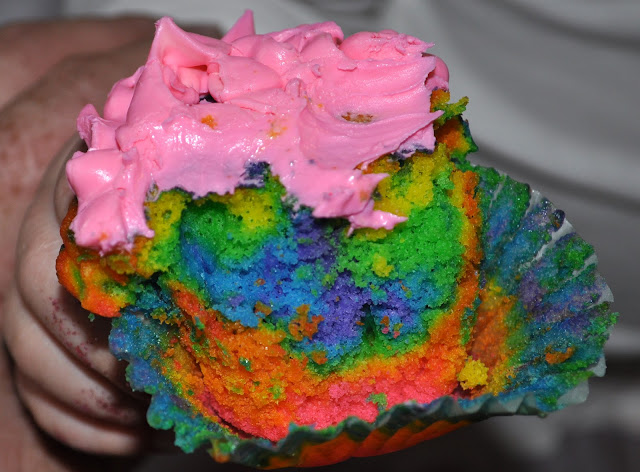
Rainbow Party {food}
We went really simple on the snacks this time.
Each girl got to fill a bowl with jelly beans and popcorn.
They also had their choice of Kool Aid drink mixes
Rainbow Party {food}
 There were also otter pops
Rainbow Party {food}
 and rainbow cupcakes.
Talk about a sugar rush!
It was definitely a sweet way to end my sweet girl's 6th birthday party.

Come back tomorrow to see what we did at the party.
We're talkin' 7 different activities!  One for each color of the rainbow.